It's no secret that I love special occasions. The decorating, the food, spending time with our family and friends, having time off work and the memories made are just some of the reasons I love when holidays or birthdays roll around.
A few months ago I told Jesse I thought we should have decorations year round to celebrate every kind of occasion. We got to thinking and decided that the best idea would be to create something that could work for a variety of special occasions - and we decided on these blocks!
They are seriously so easy to make and they can be personalised for whatever special occasions you want to celebrate - and they can also be used to display your favourite quotes!
But enough chitter chatter,
Let me show you how to make your own DIY Holiday Decor Blocks! >>
To make your own DIY Holiday Blocks, you'll need;
- The wood for your blocks
We used 70x70mm pine blocks (like this) which we cut into pieces (15 cm, 21cm & 27cm - Sanding paper
We used coarse and fine sanding paper for a smooth finish - Acrylic paint & paint brushes
In the colours needed for your design - Newspaper or a plastic cover to put down whilst you're painting
First you'll want to cut down your wood pieces to size. We used these 70x70mm (2.75x2.75") pine blocks which we found at our local hardware store in the "dressed timber section".
Some hardware stores will cut the pieces to size for you, however, there are some that only use automatic machines and thus won't cut anything shorter than 1 metre.
We cut our timber into three tiered pieces;
- 1x 15cm (5.9")
- 1x 21cm (8.3")
- 1x 27cm (10.6")
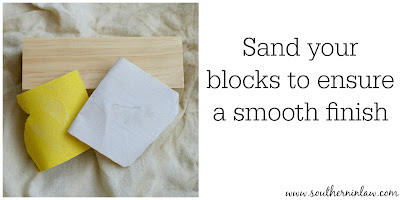
Once your pieces are cut to size, you want to sand them to ensure a smooth finish. You can leave the edges squared or round them off if you'd prefer - the choice is yours!
If you use treated pine, sanding will only take a couple of minutes!
Once you've sanded your blocks, wipe them over with a damp cloth to get rid of any dust that might get trapped underneath your paint.
Before you put paint to paint brush, have a think about what you want your finished blocks to look like!
We decided on four different designs; one for Valentine's Day (which we also use all year round), a Christmas Countdown, a Birthday Countdown and an Easter themed one.
You could design your blocks for just about ANYTHING, but here are a few ideas;
- Holidays
Think Christmas, Easter, Halloween, Thanksgiving, Valentine's Day, Mother's Day/Father's Day, Hanukkah etc. - Seasons
Spring, Summer, Autumn/Fall, Winter - Your Favourite Quotes
- Birthdays
- Special Occasions
Think Baby Showers, Anniversaries, Wedding Countdowns/ups - Hobbies
Celebrate your favourite sports or hobbies with a fun theme
If you're planning on following the same measurements as our blocks, here's a template which you can use when designing your blocks!
And there you have it! A super simple DIY project that will have you celebrating year-round!
These blocks also make brilliant gift ideas as you can design one side to match the occasion you're celebrating and then create three other designs that will compliment it!
But tell me, what's your favourite holiday?
And do you like to decorate for holidays/special occasions?

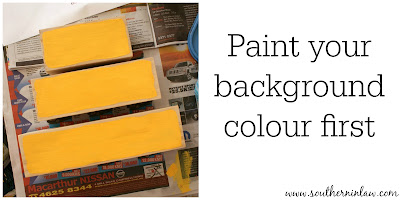
Once you've decided on your design, it's time to get painting! Obviously you can only paint one side at a time and you want to start with the background colour first.
The blocks you see here are our Easter blocks. We started with the orange/yellow background layer and left that to dry before painting on our design.
Once your background layer is dry, it's time to trace on your design! You can freehand it if you're seriously skilled, however, I found it was easier to fit everything on if I marked it out first.
You can either lightly draw your design on with a pencil - or you can place a piece of paper on top of your blocks and draw on that. This way you're not having to worry about covering up pencil marks.
You can also print out your design (if you've designed it on the computer) and trace over the top of the design onto your blocks if you don't want to freehand it! Just print out your design the same size as your block, place the piece of paper over your block and them draw over the top with a pencil - it will leave an indent like you see above which you can then paint over.
Once your design is on, it's time to get painting! I suggest using a superfine paintbrush for lettering as it will give you the most control, however, try a couple of practice runs on paper first to find what works best for you!
Take your time and don't rush it! You may also need to paint it layer by layer. For example, we first drew the designs of our eggs and then filled them in with white layer on.
If you want to have a chalkboard design like our Birthday or Christmas Countdowns, simply paint a patch on with chalkboard paint and add your designs around it!
These blocks also make brilliant gift ideas as you can design one side to match the occasion you're celebrating and then create three other designs that will compliment it!
But tell me, what's your favourite holiday?
And do you like to decorate for holidays/special occasions?


No comments:
Post a Comment
There is nothing better than reading your comments on our posts! Let us know what you think of this post!